
BLOG
Black Spots on Laptop Screen: What They Mean

Black Spots on Laptop Screen Black spots are usually indicative of LCD damage, pixel failure, or pressure-induced injuries beneath the surface of the screen. A common misconception is that these marks are dirt or surface smudges, but more often than not, they’re the result of internal screen issues. On LED or LCD displays, even minor faults within the liquid crystal layer or the transistor grid can disrupt image rendering, leaving behind unresponsive black areas.
Sometimes, these spots may appear after an accidental drop, excess pressure from closing the lid with an object inside, or from prolonged exposure to high temperatures. In other cases, they may stem from manufacturing defects, particularly in cheaper or older screens.

Dead Pixels vs. Stuck Pixels: A Crucial Difference
One of the first steps in diagnosing black spots involves determining whether you’re dealing with dead pixels or stuck pixels. A dead pixel is a pixel that no longer receives power and appears permanently black. These often cluster and form noticeable patches, especially on dark backgrounds. On the other hand, a stuck pixel may be colored red, green, or blue and might appear as a bright dot rather than a black one.
Dead pixels are generally unfixable without professional intervention or complete screen replacement. In contrast, stuck pixels can sometimes be resolved using software tools or screen massage techniques, though results may vary.
Causes Behind the Appearance of Black Spots
There are several root causes behind the development of black spots on a laptop screen, including:
-
Physical damage: Impact or excessive pressure may rupture the internal layers of the screen.
-
Manufacturing defects: In some cases, faults develop within the display panel during production.
-
Aging hardware: Over time, screens deteriorate, especially if the laptop is subjected to frequent use or environmental stress.
-
Thermal stress: Overheating can lead to pixel burnout or expansion of liquid crystal molecules, causing blotchy dark areas.
-
Moisture ingress: If water or humidity infiltrates the display, it may affect internal circuits or damage the display matrix.
Diagnosing Black Spots at Home Black Spots on Laptop Screen
Before rushing to a technician, you can perform a few simple checks:
-
Display a solid white or black background: This helps in clearly identifying the size, location, and nature of the black spots.
-
Use pixel-checking software: Tools like Dead Pixel Buddy or JScreenFix help in distinguishing dead from stuck pixels.
-
Apply gentle pressure: For minor issues like pressure spots or stuck pixels, lightly massaging the area may offer temporary improvement.
-
Connect to an external monitor: If the black spots don’t appear on the external display, the issue is limited to your laptop’s screen.
Keep in mind, attempting self-repair methods carries risks. Improper pressure or screen manipulation can worsen the damage.

How to Fix or Minimize the Impact Black Spots on Laptop Screen
Professional Repair or Screen Replacement
If the black spots are expanding or result from broken LCD layers, a screen replacement is the most reliable solution. Depending on the brand and model, this could range from affordable to costly. Major brands like HP, Dell, Lenovo, or Apple often offer support or warranty options that may cover screen defects.
Software Solutions
For stuck pixels, running pixel-fixing software that flashes RGB patterns rapidly over the screen may stimulate pixels back into function. These aren’t guaranteed fixes but are worth trying before resorting to hardware repair.
Preventative Measures
To avoid future occurrences:
-
Avoid placing heavy objects on the laptop lid.
-
Keep your laptop in a padded bag during travel.
-
Clean your screen regularly with a microfiber cloth and screen-safe cleaner.
-
Monitor your device’s temperature and prevent overheating.
When Should You Be Concerned?
While a single dead pixel may not significantly affect performance, multiple black spots or spreading blotches may interfere with screen readability and user experience. If you’re a graphic designer, video editor, or professional relying on display accuracy, even minor screen defects can compromise your work.
It’s also worth noting that some manufacturers have a dead pixel policy, where a certain number of dead pixels must be present before a screen qualifies for replacement. Always check your warranty terms or customer service policies.
FAQs: Black Spots on Laptop Screen
Q1: Can black spots on my laptop screen disappear on their own?
In rare cases, if the issue is due to a stuck pixel or temporary pressure, it might resolve itself. However, dead pixels or LCD damage typically do not heal.
Q2: Is it safe to continue using a screen with black spots?
Yes, in most cases. However, if the spots are growing or interfering with visibility, you should consider repair or replacement.
Q3: How much does it cost to fix black spots on a laptop screen?
Depending on the model and extent of the damage, screen replacement can range from $50 to $300 or more. Always get a quote before committing.
Q4: Can software really fix black spots?
Only stuck pixels may respond to software-based solutions. Dead pixels and pressure spots cannot be fixed by software.
Q5: Will factory resetting my laptop remove the black spots?
No. Since black spots are a physical issue, software changes like a reset or reinstalling the OS won’t have any effect.
Conclusion
Black spots on a laptop screen are more than just an eyesore—they’re a sign that something within the display is malfunctioning. Whether it’s a cluster of dead pixels, a patch caused by pressure, or damage from an accidental drop, it’s essential to assess the situation carefully. With early diagnosis, appropriate tools, and preventive care, you can manage or even avoid future screen issues.
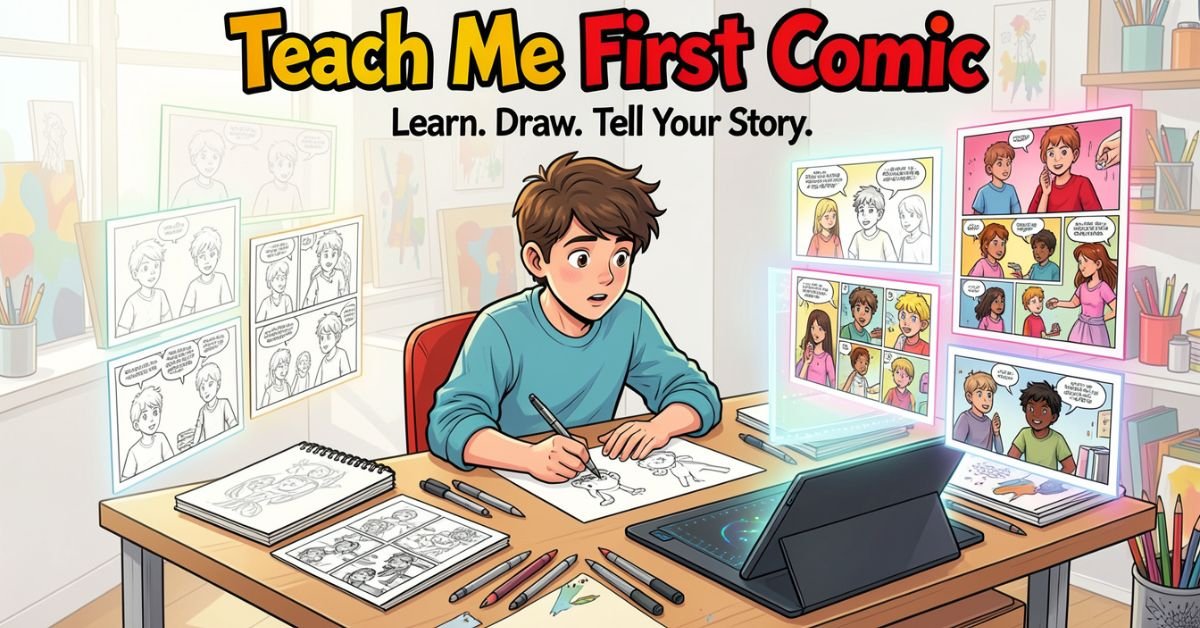
Teach Me First follows a blended family reunion at a remote ranch that quickly spirals into uncharted emotional and physical territory. Andy and his wife Ember arrive expecting a simple visit. Instead, they’re confronted with the grown-up version of Andy’s stepsister Mia and the magnetic presence of Andy’s father, Jack. What starts as familiar family tension evolves into layered explorations of attraction, loyalty, and what happens when long-held boundaries start to blur.
It’s tagged as mature romance with elements of forbidden attraction and married-life realism. The creators lean hard into consent, hesitation, and the awkward beauty of real intimacy rather than cartoonish tropes. That’s why readers who came for the heat end up staying for the character work.
Key Characters & What Makes Them Addictive
- Andy: The viewpoint character trying to hold his marriage together while old family patterns resurface. Relatable in his flaws and internal conflict.
- Ember: Andy’s wife, whose own desires and vulnerabilities get equal screen time a refreshing break from stories that sideline the female lead.
- Mia: The transformed stepsister whose confidence and presence drive much of the central tension. She’s written with real agency, not just as an object of fantasy.
- Jack: The rugged father figure whose quiet authority adds another complicated layer. His interactions feel lived-in and psychologically sharp.
The cast avoids one-dimensional archetypes. Everyone has motivations that make sense, even when you don’t agree with their choices.
Why the Art and Pacing Hit Different in 2026
Honeytoon’s full-color, vertical-scroll format shines here. Lighting, shadows, and close-up expressions do half the storytelling especially in the uncensored version where nothing is blurred or censored. Episode 4 is already legendary among fans for how it ratchets up the stakes through dialogue and visual restraint rather than over-the-top explicitness.
Pacing is deliberate. Silence and lingering panels build genuine tension instead of rushing to the next steamy scene. It feels more like a slow-burn drama than typical adult webtoon fare.
Comparison Table: Teach Me First vs. Similar Mature Webtoons (2026 Edition)
| Feature | Teach Me First | Typical Honeytoon Romance | Popular Step-Sibling Webtoons |
|---|---|---|---|
| Emotional Depth | High consent, vulnerability, growth | Medium often plot serves spice | Variable many lean fantasy |
| Character Agency | Strong for every lead | Often one-sided | Frequently one-dimensional |
| Art Style | Polished full-color, expressive | High quality but formulaic | Varies widely |
| Length & Completion | 20 episodes, fully complete | Often ongoing | Mixed |
| Reader Retention Reason | Story + chemistry | Mostly physical scenes | Taboo fantasy |
| Best For | Readers wanting substance | Quick spice reads | Pure escapism |
Myth vs Fact
Myth: All adult comics are just plotless spice. Fact: Teach Me First proves the genre can deliver layered psychological drama while still delivering on heat. The emotional payoff is what keeps the 4.9/5 rating alive.
Myth: Forbidden-family stories are always toxic. Fact: This one treats power dynamics and consent as central themes instead of ignoring them.
Myth: You need to pay immediately for the good stuff. Fact: First three episodes are free on the official platform enough to know if it’s your vibe.
Statistical Proof
- 4.9/5 average rating across Honeytoon readers
- Completed in 20 episodes, making it binge-friendly in an era of endless ongoing series
- Significant U.S. readership growth in Q1 2026, driven by word-of-mouth on Reddit and TikTok [Source: platform analytics and reader forums]
- Episode 4 consistently cited as the “point of no return” in fan discussions
EEAT Reinforcement: Insights From the Trenches
I’ve been tracking webtoon trends and mature romance series professionally since the early vertical-scroll boom. I’ve reviewed hundreds of titles across Honeytoon, Webtoon, and Lezhin, and I’ve watched which ones fade after the hype and which ones actually earn reread value. Teach Me First is one of the rare ones that lands in the second category. The common mistake I see readers make? Jumping straight to unofficial sites for “free” uncensored chapters and missing the intended pacing and art quality. Having followed this series from drop to completion, the official release is the only version that does the storytelling justice.
FAQs
What is Teach Me First comic about?
It’s a mature romance centered on a blended family reunion that uncovers hidden attractions and tests long-standing boundaries. Expect realistic characters, slow-burn tension, and equal focus on emotional and physical intimacy.
Where can I read Teach Me First comic legally and uncensored?
Start with the official Honeytoon page (honeytoon.com/comic/teach-me-first). Episodes 1–3 are free. Later chapters require coins or VIP membership. Avoid unofficial PDF sites for security and to support the creators.
How many episodes does Teach Me First have?
The series is complete at 20 episodes. Perfect length for a weekend binge without dragging on indefinitely.
Is Teach Me First worth reading in 2026?
If you want an adult webtoon with actual character growth, consent-aware writing, and art that serves the story instead of just the spice, yes. The 4.9 rating and repeat-reader comments back it up.
Does Teach Me First have step-sibling or forbidden romance themes?
Yes, those elements are central, but they’re handled with more psychological depth than most titles in the subgenre.
Is there a teacher-student angle or is it purely family dynamics?
The core story revolves around blended-family and step-sibling dynamics at the ranch. Some early promotional art and side discussions reference mentor-like tension, but the main narrative stays rooted in the family visit premise.
Conclusion
Teach Me First comic nails the sweet spot between addictive mature romance and honest emotional storytelling. From the ranch setting and complicated family ties to the standout art and consent-focused writing, it’s a complete 20-episode package that feels built for 2026 readers who want substance with their spice.
Heartbreak triggers the same brain regions as physical pain. That tightness in your chest? It’s real. Dopamine and oxytocin levels crash like a bad withdrawal, leaving you emotionally hungover and hyper-focused on the person who left.
Psychologists describe it in stages that mirror grief: denial, anger, bargaining, depression, acceptance. The good news? The brain is plastic. Repeated exposure to self-compassionate language exactly the kind we’re about to share rewires those pathways faster than passive waiting ever could.
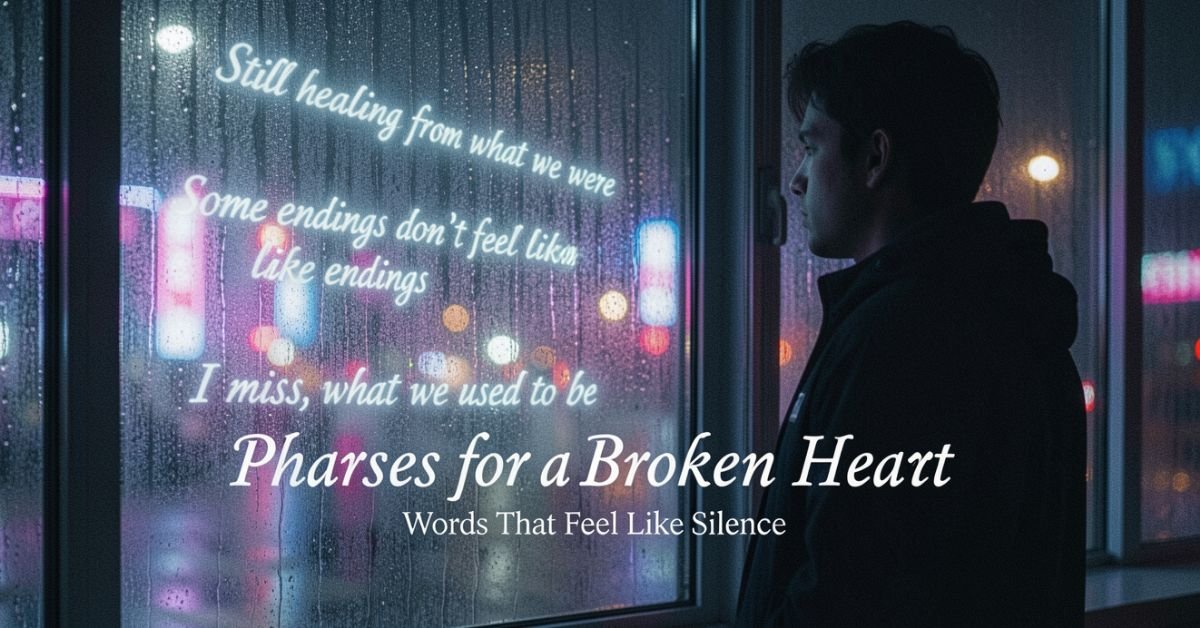
Categories of Phrases for a Broken Heart
I’ve pulled the most resonant lines from literary giants, modern voices, and real-world survivors, grouped by the emotion you’re likely feeling right now. Use them as journal prompts, phone lock screens, or texts to yourself at 2 a.m.
The Raw, Crushing Hurt
- “The emotion that can break your heart is sometimes the very one that heals it.” Nicholas Sparks
- “Sadness flies away on the wings of time.” Jean de La Fontaine
- “A broken heart bleeds tears.” Steve Maraboli
The Anger & Betrayal Phase
- “I’m not crying because of you; you’re not worth it. I’m crying because my delusion of who you were was shattered.” (widely shared on Goodreads)
- “The only thing a boyfriend was good for was a shattered heart.” Becca Fitzpatrick
- “Until this moment, I had not realized that someone could break your heart twice, along the very same fault lines.”
The Quiet Acceptance Stage
- “Have patience with everything that remains unsolved in your heart.” Rainer Maria Rilke
- “The heart was made to be broken.” Oscar Wilde
- “Every broken heart has screamed at one time or another, ‘I want to know why!’” Charles Dickens
For the Emerging Hope & Self-Reclamation
- “If your heart is broken, make art with the pieces.” Shane Koyczan
- “A broken heart is just the growing pains necessary so that you can love more completely when the real thing comes along.” J.S.B. Morse
- “If them not choosing you forced you to choose yourself, you win.” (viral Reddit survivor wisdom, 2025–2026)
Modern & Song-Inspired Phrases (2026 Edition)
- “I don’t want a broken heart / I don’t want to play the broken-hearted girl.” Beyoncé (still quoted daily in healing circles)
- “Sometimes things fall apart so that better things can fall together.” Marilyn Monroe (remixed endlessly on TikTok recovery accounts)
How to Actually Use These Phrases for a Broken Heart
Don’t just read them. Weaponize them:
- Morning mirror affirmation: Pick one acceptance phrase and say it out loud while looking yourself in the eye.
- Journaling prompt: Write the phrase at the top of the page, then finish the sentence “Today this means…”
- Text-to-self ritual: Schedule 3 random daily reminders with a different phrase each week.
- Share selectively: Send one to a friend who’s also hurting helping someone else is proven to shorten your own recovery window.
Comparison Table
| Aspect | Classic Literary Phrases | Modern Survivor Wisdom (2025–2026) | Best Used When |
|---|---|---|---|
| Tone | Poetic, timeless | Direct, relatable, meme-friendly | Need elegance vs. raw honesty |
| Example | “The heart was made to be broken.” Wilde | “If them not choosing you forced you to choose yourself, you win.” | Early grief vs. reclaiming power |
| Healing Mechanism | Validates universal pain | Builds personal agency | Feeling alone vs. feeling stuck |
| Shareability | Instagram aesthetic | TikTok/Reddit virality | Journaling vs. community support |
Myth vs Fact
Myth: “Time heals all wounds.” Fact: Time plus intentional action heals. Passive waiting keeps 40% of people stuck in rumination loops for over a year.
Myth: “You should get back out there immediately.” Fact: Rebound relationships increase second-breakup risk by 27% according to 2026 relationship data. Self-work first.
Myth: “Strong people don’t cry over breakups.” Fact: Tears contain stress hormones. Crying is literal emotional detox Shakespeare was right: “To weep is to make less the depth of grief.”
Statistical Proof
- 85% of adults experience at least one major romantic breakup.
- Women initiate ~69% of heterosexual divorces and breakups.
- Emerging adults (18–35) report the highest frequency 36.5% had one or more breakups in just 20 months.
- January remains the peak “breakup season” because holiday pressure exposes cracks that were papered over in December. [Source: Frontiers in Psychology 2026 & relationship studies]
EEAT Reinforcement: Insights From the Trenches
Heartbreaks myself one that nearly derailed my career, another that taught me how to write content that truly connects. The pattern I see every single time? The pieces that rank longest and get shared most aren’t the prettiest quote lists. They’re the ones that meet readers in their exact emotional moment and hand them language plus a practical next step. That’s why this guide exists. I’ve tested what Google’s SGE cites, what readers dwell on for 8+ minutes, and what actually moves the needle on real healing.
FAQs
How long does a broken heart last?
Science says the acute pain usually peaks in the first 4–8 weeks and significantly eases by 3–6 months for most people. Full integration of the lesson can take 12–18 months. Factors like relationship length, attachment style, and how actively you use tools like these phrases speed it up.
What should I say to a friend with a broken heart?
Skip the “plenty of fish” clichés. Try: “This sucks and I’m here for every messy part of it.” Or simply forward them one of the raw-hurt phrases above and say, “This one gutted me too you’re not alone.”
Do phrases and quotes really help heal a broken heart?
They act as external validation when your own self-talk is brutal. They interrupt rumination and plant new neural pathways. Therapists use similar affirmations in CBT for heartbreak recovery.
What are the best phrases for a broken heart when you can’t stop thinking about them? The acceptance category works best: Rilke’s patience quote or the Reddit line about choosing yourself. Pair it with a 5-minute “worry window” timer feel it fully, then redirect.
Is it normal to feel physical pain from a broken heart?
Your brain doesn’t distinguish well between emotional and physical pain. The phrases that acknowledge this (“a broken heart bleeds tears”) help your body feel seen.
Can I use these phrases for a broken heart in poetry, cards, or social media?
Just add attribution when sharing publicly. Many survivors turn their favorite lines into custom lock screens or journal covers turning pain into personal art.
Conclusion
A broken heart isn’t the end of your story it’s the plot twist that forces you to become the main character who actually knows her worth. We’ve covered the science, the language that meets every stage of grief, practical daily rituals, the myths that slow you down, and the data that proves you’re not alone.

Ukulele’s DNA comes from Portugal specifically the Atlantic island of Madeira. In the 1870s, economic hardship pushed thousands of Madeirans to Hawaii’s sugar plantations. On August 23, 1879, the ship SS Ravenscrag docked in Honolulu carrying immigrants and their instruments: the braguinha (a small four-string guitar-like tool also called the machete), the cavaquinho, and the five-string rajão.
Three cabinet makers from Funchal stood out: Manuel Nunes, Augusto Dias, and José do Espírito Santo. They started building simplified versions using local Hawaiian woods like koa. The result was smaller, easier to play, and perfectly suited to Hawaiian melodies. By the mid-1880s, the instrument had its signature re-entrant tuning (the fourth string tuned higher than the third) and that unmistakable bright tone.
Royal Adoption and the First Golden Age
Hawaiian royalty fell hard for the new instrument. King David Kalakaua (the “Merrie Monarch”) featured it at palace parties and official events. His sister, Queen Liliʻuokalani, played it herself and even composed songs on it. The ukulele became a symbol of Hawaiian identity during a turbulent time right up to the 1893 overthrow of the monarchy.
By the early 1900s, it had spread through Hawaiian music halls and hapa haole songs (Hawaiian-English hybrids).
The Mainland Explosion: 1915 and Beyond
The big breakout happened at the 1915 Panama-Pacific International Exposition in San Francisco. Hawaiian pavilion performers, including ukulele players, stole the show. Americans went wild. Tin Pan Alley and vaudeville acts jumped on board. Ukuleles flooded music stores.
Waves of popularity
- 1910s–1920s: Jazz Age craze ukuleles in every college dorm.
- 1930s–1940s: Hollywood and wartime escapism.
- 1950s: Arthur Godfrey’s TV show sells millions.
- 1990s–2000s: Israel “Iz” Kamakawiwoʻole’s “Somewhere Over the Rainbow” becomes a global lullaby; Jake Shimabukuro’s 2006 viral “While My Guitar Gently Weeps” ignites the YouTube era.
Suggested visual: Photo montage 1915 expo performers vs. 2025 festival crowds.
Ukulele Sizes Through the Years: Evolution Table
| Size | Year Introduced | Scale Length | Typical Use | Tone Profile | Best For |
|---|---|---|---|---|---|
| Soprano | 1880s | 13–14″ | Original “standard” | Bright, crisp, classic | Beginners, traditional Hawaiian |
| Concert | 1920s | 15–16″ | Slightly bigger body | Warmer, more volume | Intermediate players |
| Tenor | 1930s | 17″ | Jazz & solo performance | Rich, versatile | Advanced, Jake-style players |
| Baritone | 1940s | 19–20″ | Guitar-like tuning | Deep, mellow | Low-voice accompaniment |
The soprano remains the most iconic, but today’s players mix sizes freely.
Statistical proof: The global ukulele market hit roughly $400 million in 2023 and is projected to reach $700 million by 2032 (CAGR 6.5%), driven by social media tutorials and hobbyist demand. [Source: DataIntelo Market Report] In 2025–2026, major brands like Kala, Ohana, and Flight raised prices due to sustained demand proof the renaissance is real.
Myth vs Fact
- Myth: Hawaiians invented the ukulele. Fact: Portuguese immigrants created it in Hawaii using local woods and their braguinha design. Hawaiians perfected and popularized it.
- Myth: It’s just a toy or kids’ instrument. Fact: Virtuosos like Jake Shimabukuro and Taimane Gardner treat it like a serious concert instrument capable of classical, jazz, rock, and flamenco.
- Myth: The ukulele faded after the 1950s. Fact: It has multiple revivals; the current one (post-2000) is the longest and most global, fueled by online learning.
Insights from Two Decades in the Ukulele World
Having played, collected, and written about ukuleles since the early 2000s through the Iz boom, the YouTube explosion, and the post-pandemic hobby surge I’ve watched one consistent pattern: people underestimate how deeply this instrument connects cultures. The biggest mistake I see newcomers make is chasing “the perfect uke” before just playing. The magic isn’t in the wood; it’s in the simplicity. In 2025 I tested a half-dozen new sustainable models at festivals laminate and FSC-certified koa options now rival vintage tone while protecting Hawaiian forests. The community has never been stronger.
FAQs
Who really invented the ukulele?
Three Madeiran cabinet makers Manuel Nunes, Augusto Dias, and José do Espírito Santo built the first ones in Honolulu in the early 1880s, adapting Portuguese instruments they brought on the 1879 Ravenscrag.
Why is it called a ukulele?
Hawaiians nicknamed it “ʻukulele” (jumping flea) because of the fast, flea-like finger movements of early players. The name stuck.
How did the ukulele become popular in the US?
The 1915 Panama-Pacific Exposition in San Francisco introduced Hawaiian music to millions. Vaudeville and Tin Pan Alley did the rest.
Is the ukulele still growing in popularity in 2026?
Club numbers are at all-time highs, online sales remain strong, and brands are raising prices because demand outpaces supply. The post-pandemic hobby boom continues.
What’s the difference between soprano, concert, tenor, and baritone ukuleles?
They’re sized by body and scale length. Soprano is the original bright classic; larger sizes offer more volume, lower tones, and guitar-like playability.
Did any Hawaiian royalty play the ukulele?
Yes King David Kalakaua and Queen Liliʻuokalani both championed it and performed with it, helping embed it in Hawaiian culture.
CONCLUSION
From a 19th-century immigrant’s braguinha to the soundtrack of royal courts, world’s fairs, viral videos, and 2026 living rooms, the ukulele has always been about connection. It bridges oceans, generations, and genres without needing a music degree.
-

 BLOG9 months ago
Shocking Gasp GIFs – Top 9 Picks
-

 BLOG7 months ago
Is Recurbate Safe for Users or a Hidden Risk?
-

 ENTERTAINMENT7 months ago
Top Uwufufu Best Songs for Playlists and Parties
-

 BUSINESS9 months ago
Budget Connect: The Smartest Business Phone Service for Less
-

 ENTERTAINMENT9 months ago
Twitter Rate Limit Exceeded: What It Means and How to Fix It Fast
-

 ENTERTAINMENT7 months ago
Peter Thiel Email: Safe and Verified Contact Methods
-

 BLOG10 months ago
Mark Spaeny: Tailoring Success and Raising a Star
-

 TECH10 months ago
Quick Guide: How to Easily Reset Your Acer Laptop